Friday, January 13, 2012

A Whole Bunch of Cards!

My friend Tracy asked me to make her a bunch of thank-you cards.  She needed about 25 or so.  Well, that meant finding something simple (even though all my cards are simple, really) that I could mass produce with little problems.  Again, thank Heaven for Pinterest.  I have a board just for the cards I see that I like.  I do not think I could ever make all of the cards I have pinned on there but they really do give me inspiration.
This card was originally created by Debra at Artfelt Impressions.  I really loved the simplicity of this card and that I could have it done in a short amount of time and will not too many materials.  I was also able to use up some of my paper stash which is a major goal for me this year. 
I plan on making more of these using different colors and different themes.  How cute would this one be with three hearts for Valentines or an anniversary?  Or use pastels for a baby card?  I love it!! 


Parts and Pieces:
Stampin' Up Star punch
Cuttlebug Polka Dots embossing folder
Cuttlebug
Brads from EK Success
Patterned paper from my stash


Scrapbook Pages completed in 2012: 8
Cards completed in 2012:  26
Craft Projects completed in 2012:  1

Friday, January 6, 2012

Applause!

I like to give credit where credit is due and also let people know when I find a company that has great customer service. 

Recently I placed an order with Custom Crops for some stamps and Art Bin Cartridge Storage containers.  The containers arrived damaged so I called customer service and they sent me two new containers with no hassle, no problems whatsoever.  They shipped them out immediately and I have them in my hands within two days.  

I love these containers and can't wait to load them up with my carts and free up some much needed storage space in my scrappy area.


Each container holds 16 carts, books and overlays as well as a small area to hold some tools if needed.  I might see if I can fit a few of my Solutions carts in the supply storage area since there aren't any books for those. 
I really think I will use some of my carts more often because I will be able to see them and have them handy.

Happy Scrapping!

Scrapbook Pages completed in 2012: 8
Cards completed in 2012:  0
Craft Projects completed in 2012:  0

Thursday, January 5, 2012

Twine Solution


I bought this twine from Stampin' Up! but once the package was opened, it was a mess.  I could do nothing with it.  When I was trying different sized clothes pins for my Card holder project. I realized that the large clothespins would work great to bundle the twine together and keep it from unravelling into a huge mess again.  I love easy storage solutions like this one.

Parts and Pieces:
Clothespins
Twine

Wednesday, January 4, 2012

New Year, New Goals, New Projects

Happy New Year!  I have spent the last few weeks enjoying Christmas Break with my kids and hubby and trying to get through the mad rush that always accompanies the Christmas Holidays.  The rush to finish shopping, get Christmas cards sent, packages in the mail, presents wrapped, cookies baked, and craft projects finished.
Whew!  As much as I love Christmas, I am always happy when January 1 rolls around and I can take down all the decorations and get things back to normal around here.  Well, as normal as they can be.
I did remember to take a picture of one of my favorite projects before I put it away.

I am becoming a huge fan of canvas.  I buy the value packs from Michael's and like them a lot.  I used an 8x10 canvas for this one and "borrowed" my hubby's staple gun (it is now part of my craft supplies and will not make it back into his toolbox) to attach the ribbons to the top and bottom.  I left the mini clothespins plain but I can always change that later if I feel like it.  I wanted to see how well they would hold up with the cards we hung from it.  It worked very well and I am thrilled to have a cute place to display the cards we receive from our friends and family.

Parts and Pieces:
8x10 canvas
Plaid Folk Art Paint - Red
Cricut Vinyl - White
Christmas Ribbon
Small clothespins
Cricut Christmas Solutions Cartridge

Tuesday, December 13, 2011

You've Got Mail!


These mini mailboxes from Target are so cute!!  I bought these last year from their dollar spot and never did anything with them.  Well, I came across them in my flurry of crafting and decided to do something with them this Christmas.  I am going to fill these with Hershey Kisses and a special gift for a few of my friends and family.
I cut the Christmas paper just short of 4 inches and it fit perfect.  The reindeer (isn't he so cute!!) is from Doodlecharms.  I tend to forget about that cartridge when I am crafting.  I will have to move it to my favorites drawer so I am reminded to use it more often.
I also like these because I was able to use some of the busier Christmas paper I have without it being overwhelming.  Great way to use that paper you just don't know what to do with.
I like that this can be a cute Christmas decoration after the gift is opened.
Parts and Pieces:
DCWV Christmas Stack
Mailbox from Target
3/4- inch circle punch
Stampin' Up! Card stock - Close to Cocoa, Creamy Caramel
Doodlecharms Cricut cartridge
Stickles - Christmas Red
Stampin' Up! Ink pad - Real Red
 Stampin' Up! Stamp-n-Write marker - Handsome Hunter
My Pink Stamper stamp - Christmas Wishes
Google eyes
Stampin Up! scallop circle punch

Sunday, December 11, 2011

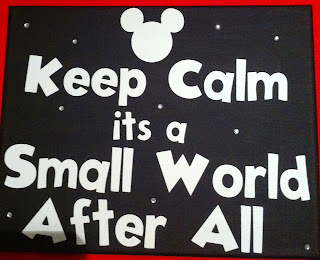
Keep Calm...


This is yet another idea from Pinterest (I really, really love that site!).  I could not wait to make it for my kitchen.  I really should have been working on Christmas presents, gift wrapping, and cookie baking but I couldn't get this one out of my mind.  I am a huge Disney fan and this was so perfect for me.  I wanted to make this on canvas and needed to use my Cricut Gypsy to design and cut this one.  Mickey Font was perfect for the sign and I was so happy I had white vinyl on hand.  I also used my iRock tool to add the sparkles. 
I need to design and make some for my kids as well.  When I showed the girls this one, they all wanted it for their rooms.

Parts and Pieces:
8x10 Canvas from Michaels
Black Acrylic paint - Plaid
White Vinyl - Cricut (Provocraft)
iRock tool and gems

Monday, December 5, 2011

A Pretty Lamp to Light the Way


Another idea I saw on Pintrest (I just LOVE that site!!).  My oldest daughter has decided to redo her room.  I really did not want to have to buy new bedding and change everything that was blue so I was thrilled when she agreed to just add some new colors.  I saw a redone lampshade like this one on Pintrest and thought it would be perfect for her room.  It would add a girly flair and make use of a lamp we already had.  We plan to paint the base once I get out and get the paint.
I got the ruffle trim from JoAnn's and already had the jeweled brads and Prima Flowers.  I needed 6 yards of the trim to cover this lampshade.  I used my trusty hot glue gun to adhere the trim to the shade.  The lamp uses a low wattage bulb so I am not too worried about the heat.  In spite of the many times I burned my fingers with the hot glue (I really need to pay more attention to what I am doing and less on the Harry Potter movie playing in the background) I had a lot of fun making this.  Of course, there was the added bonus of a happy teenager when she saw her new lamp.  I think I got some good mom points for this one.  :)

Happy Scrapping and Crafting!